Here’s a guide to show how to email receipts and attach them in aio*
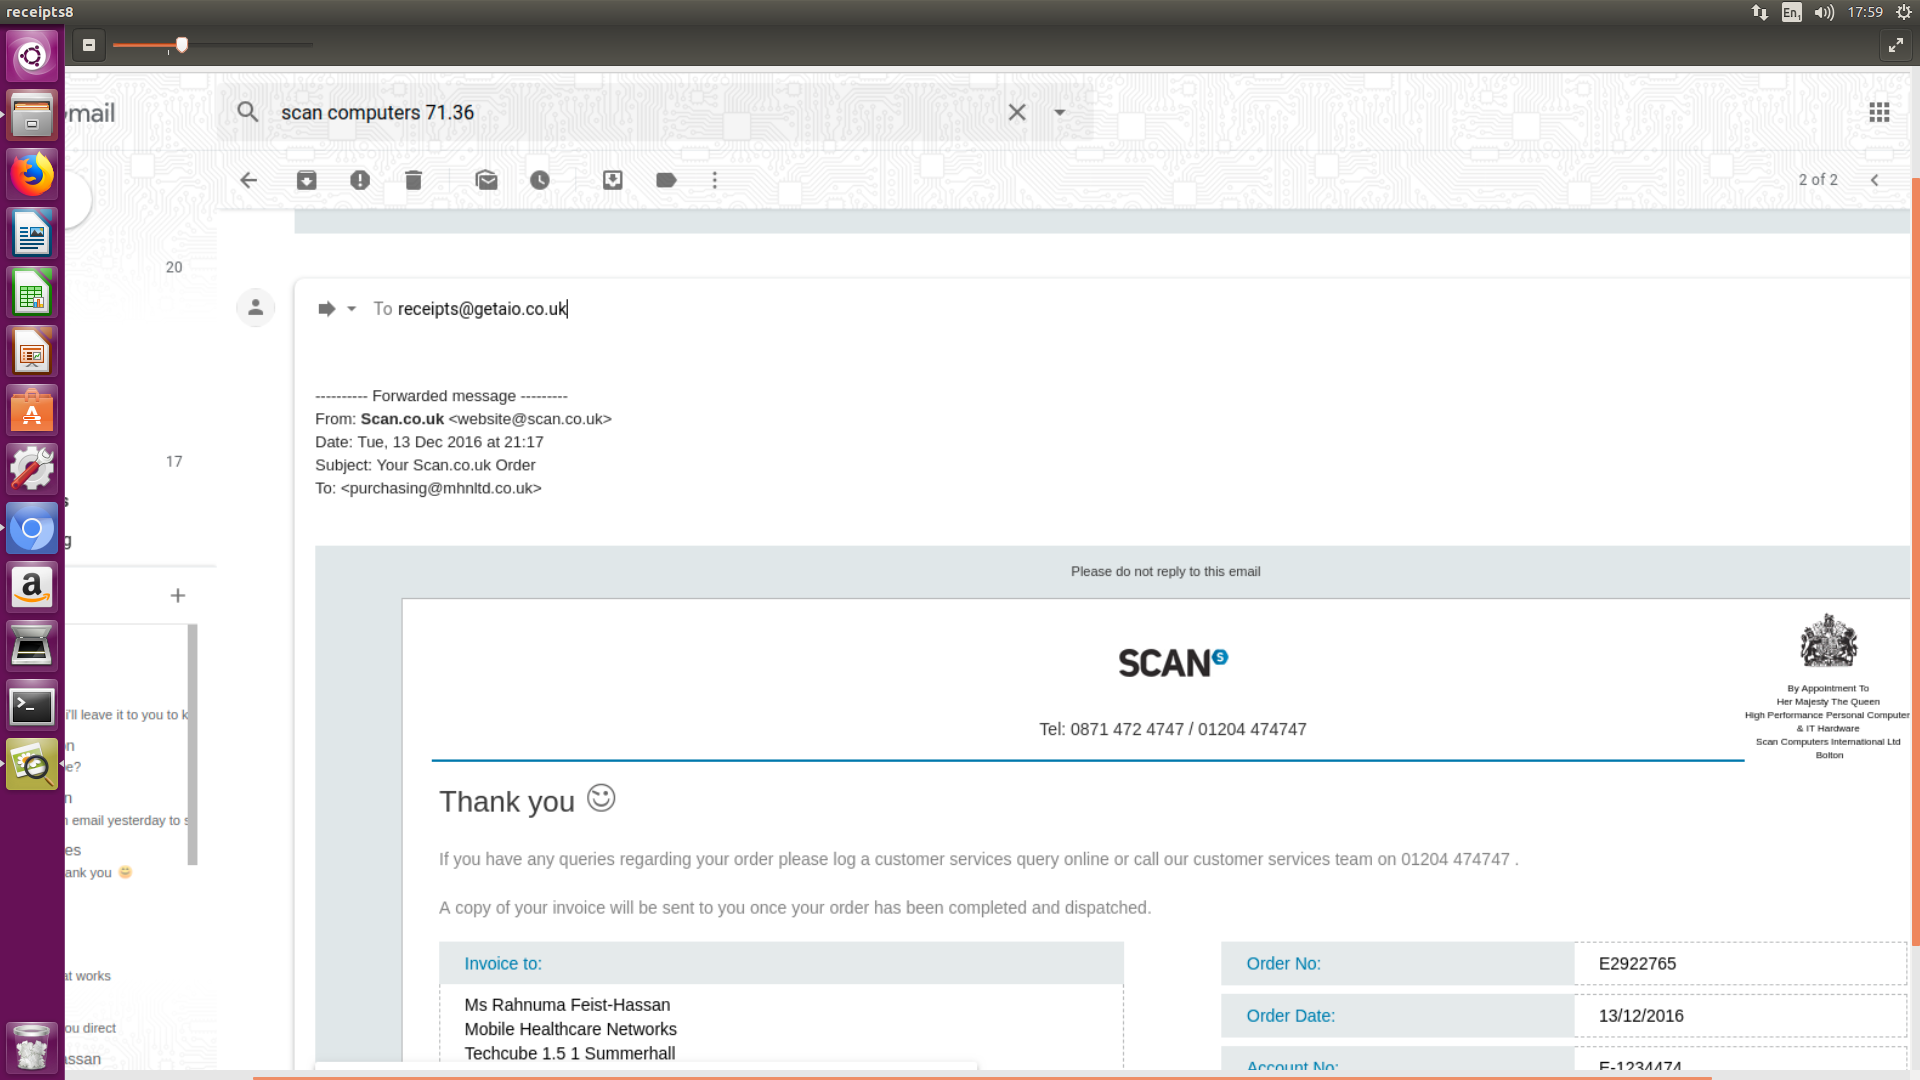
- Sometimes when making online purchases using your aio* card you will receive a receipt or invoice in the body of an email rather than as a PDF attachment.
- To attach these kinds of receipts to your transactions in your aio* app, you can forward these emails to receipts@getaio.co.uk and they will be uploaded as images that you can select in app.
- Once you’ve forwarded your desired receipts to receipts@getaio.co.uk. You can log into your aio* app and follow the instructions below.
 |
|
|
|
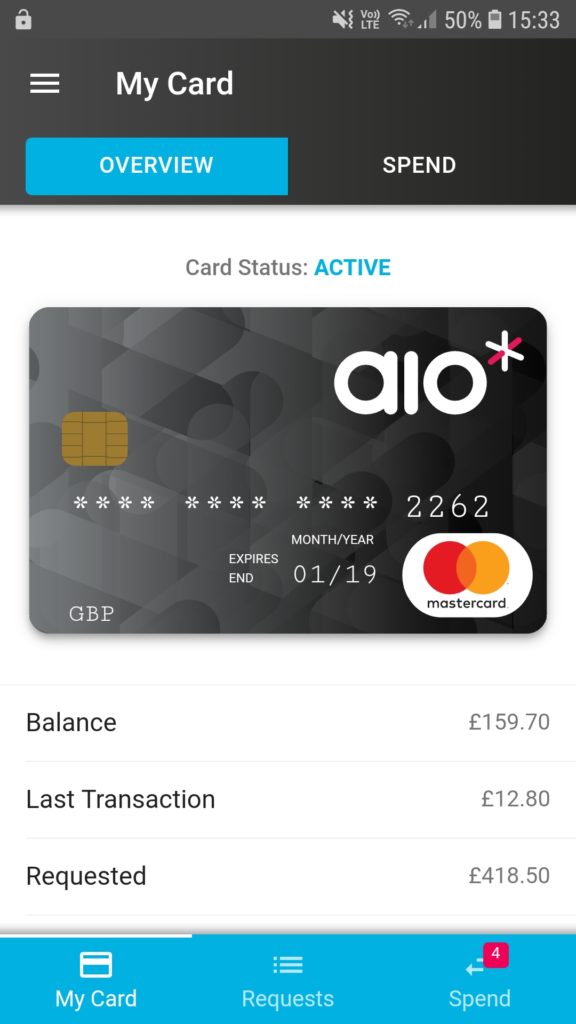 |
- Tap on top right hand tab “SPEND” or bottom right tab that says “Spend” to view your transactions
- If you have uncategorised transactions then a red box with a number indicating how many uncategorised transactions you have will show on the bottom right“Spend” tab
|
|
|
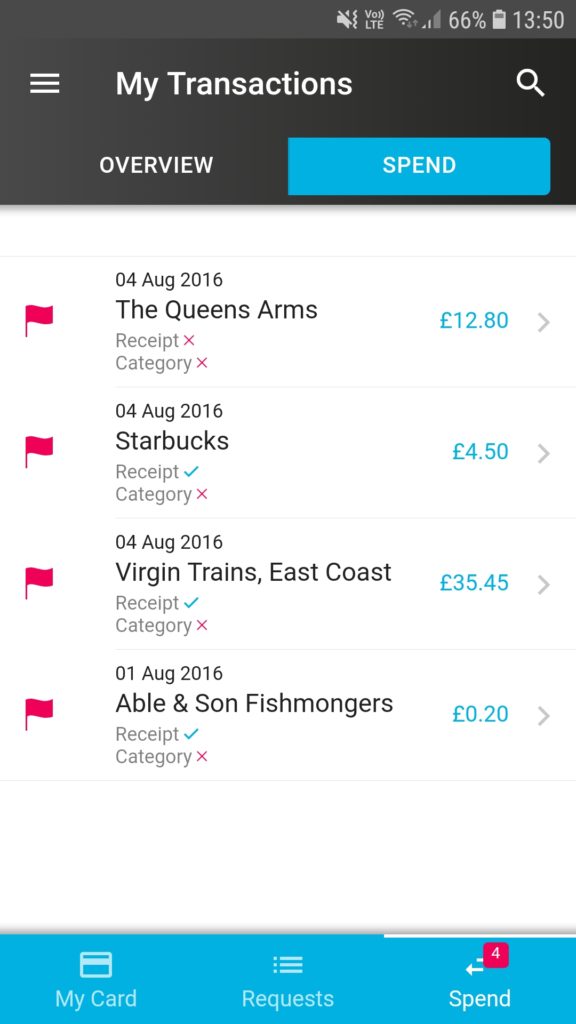 |
- In “My Transactions” any listed transaction that does not have a spend category selected will have a red flag
- Tap on the transaction that you want to view and you’ll be taken to its “Transaction Details” page
|
|
|
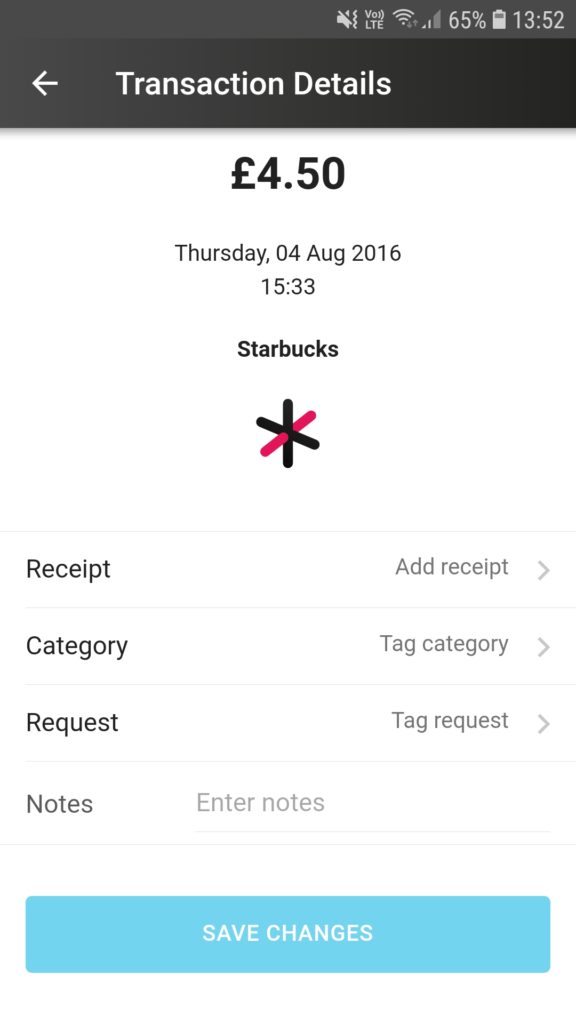 |
- In “Transaction Details” you can add a receipt
- To attach a receipt, tap on “Add receipt” and a pop-up menu will appear with 3 options
|
|
|
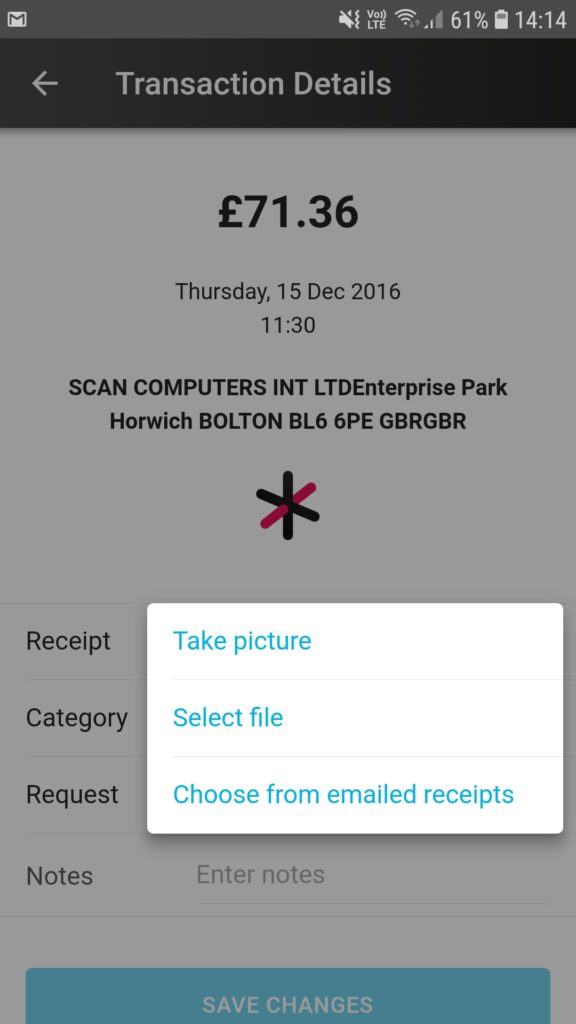 |
- Tap on “Choose from emailed receipts” to go to the receipts that you forwarded via email to receipts@getaio.co.uk
- If there are no emailed receipts available to attach, then it will say “You can also forward email receipts to receipts@getaio.co.uk ”
|
|
|
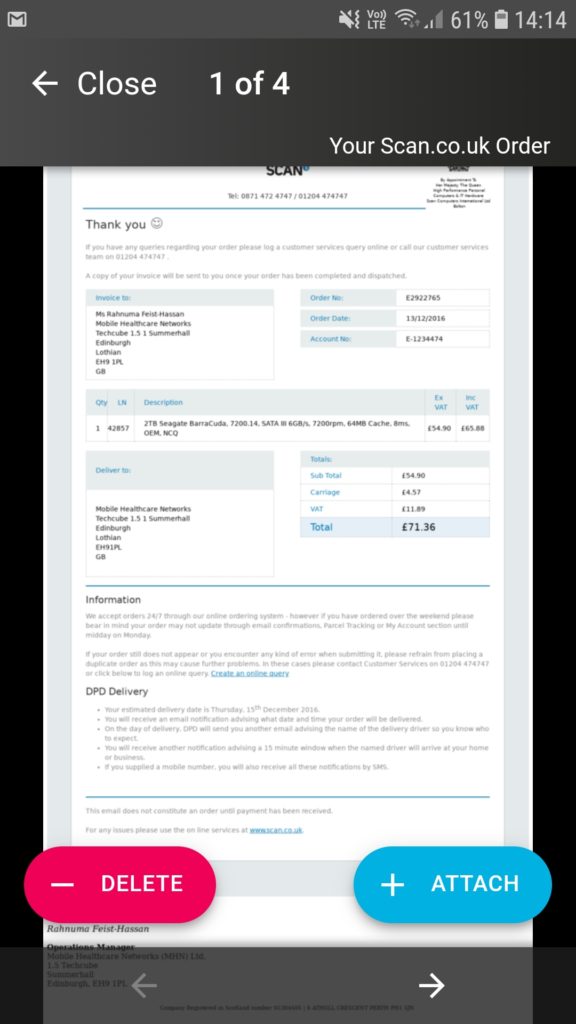 |
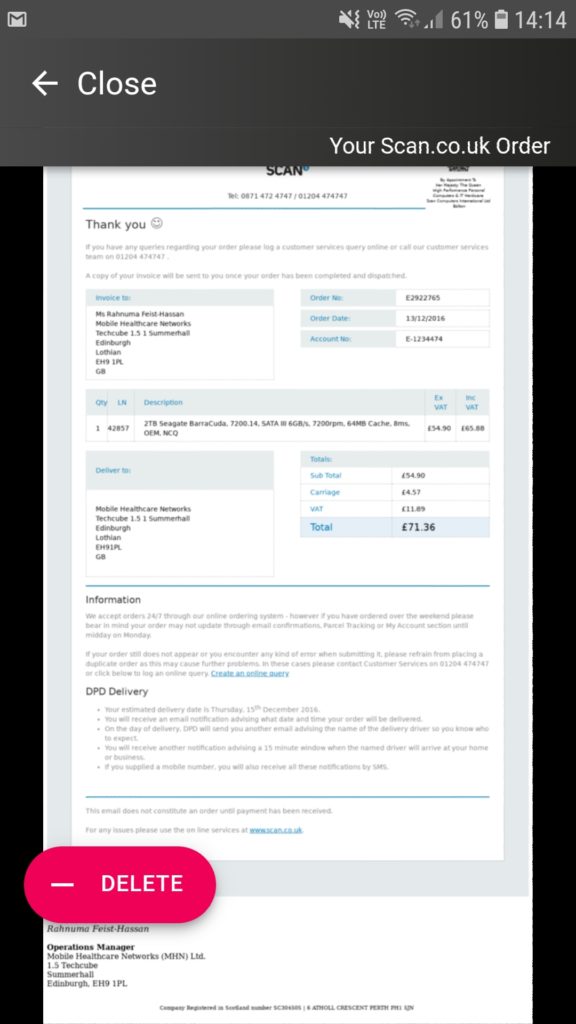
- You can see how how many emailed receipts there are in the middle top of your screen (1 of 4 etc.)
- You can use the arrows at the bottom of the screen to view all the emailed receipts if you have multiple
- Once you have the desired emailed receipt then you can tap on the “+ATTACH” button on the bottom right of the screen
- If you no longer need the email receipt, you can tap “-DELETE”on the bottom left of the screen
|
|
|
|
|
|
|
 |
- Once you’ve either attached or deleted the emailed receipt, you will be returned to the “Transaction Details” page
- If you’re happy with the changes you made, tap on the blue “SAVE CHANGES”button
- You can then view and/or delete the receipt by tapping on “View receipt”
|
|
|
 |
- If you want to delete the file tap on the “-DELETE” button on the bottom left corner
|
|
|
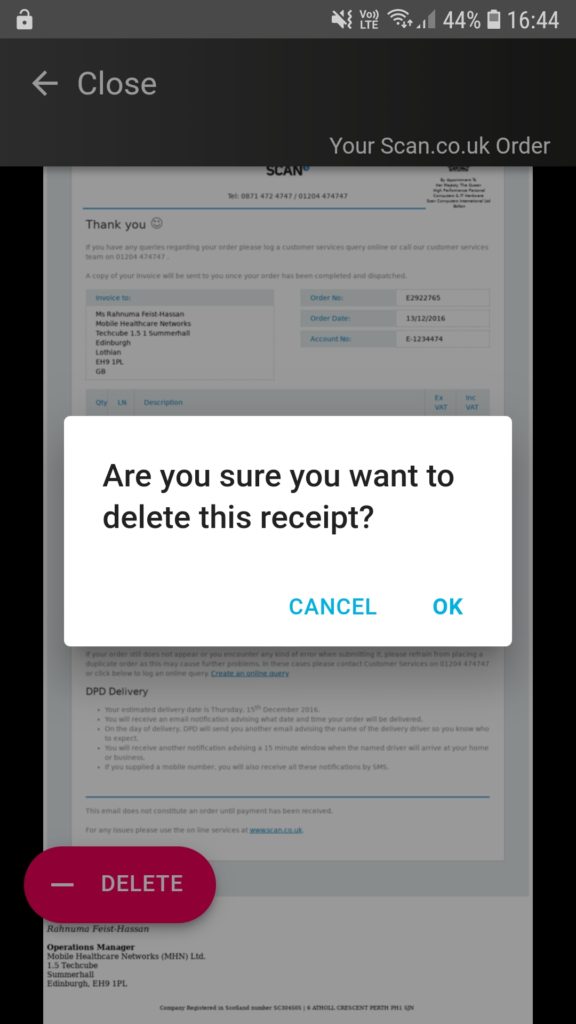 |
- A pop up will appear asking you to confirm your choice.
- Tap on “OK” to confirm deletion of file
|